Parallel lines by
Alice Akinyi
6
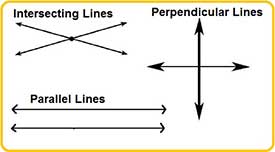
PARALLEL LINES
What are parallel lines?
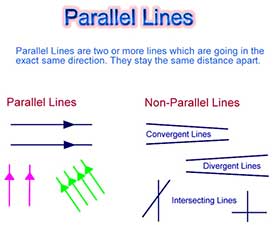
Parallel lines are two or more lines which are going in the exact same direction and stay in the same distance apart.
They also meet or intersect each other.
Compare the lines below
What have you noticed?
Observe the following lines
- Lines which intersect each other are not parallel
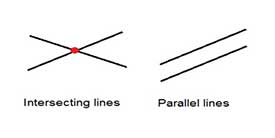
What is intersecting?
To intersect means dividing (something) by passing or lying across it
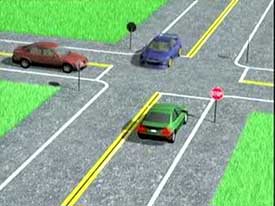
Roads intersecting each other
What do you notice?
- Lines intersecting each other
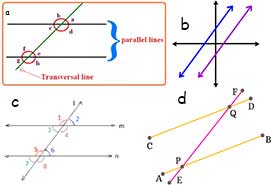
Activity 1
1.Identify parallel lines.
ANSWERS
(b) AB and CD
(c) M and N
(d) AB and CD
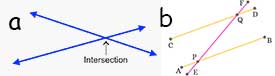
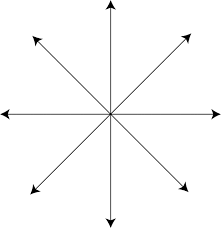
Activity 2
2.Identify points of intersection.
6
PERPENDICULAR LINES
What is a perpendicular line?

Observe diagram below

Observe the table below
What do you notice?
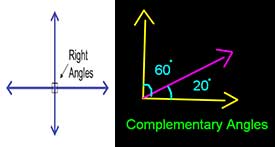
The angles formed by the perpendicular line are right angle
A right angle is 90°. A right angle is also called complementary. Therefore two or more angles within the right angle are called complementary angles.
PART A) Steps to follow when constructing parallel lines
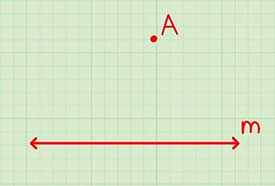
1. Locate the given line and point it will be above or below the given line.
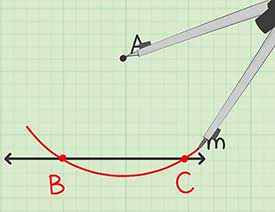
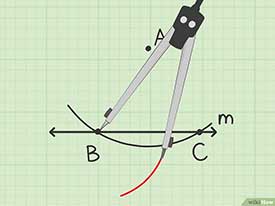
2.Draw arcs that intersect the given line at two points .
To do this place the compass tip on point A .open the compass a little so that it's wide enough to reach line M , draw an arc that passes across the line at the point marked c
3. Draw small arcs opposite the given point.
To do this open the compass a little wider put the compass tip on point B and draw an arc that passes directly across from point A
- Remember the tip of the pencil must be the same level as the tip of the compass
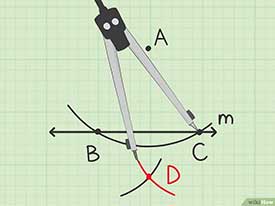
4.Draw another small arc intersecting the previous arc.
To do this keep the same radius (distance) ,put the compass tip on point C and draw an arc that intersect the previous arc and label it D .
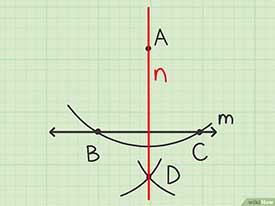
5. Draw a line that connect the given points and the intersecting point of the two small arcs and label this line N. Line N is perpendicular to line M through points A and D
Remember perpendicular line creates a right angle (90°)
- The from A to D must cut across the two intersecting arcs
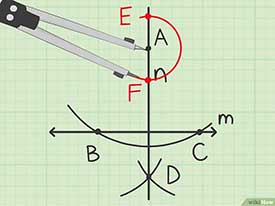
6.Draw,an arc that intersect the perpendicular line at two points. To do this place the compass tip on point A then draw an arc that passes across line Nat points E and F.
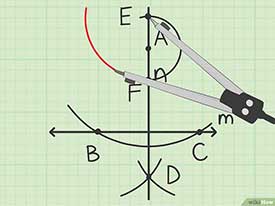
7.Draw a small arc opposite given point.
To do this open the compass a little wider. Put the compass tip on points E and draw an arc that passes directly across from A
6
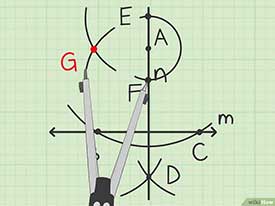
8.Draw another small arc intersecting the previous arc . To do this keep the compass set to the same width, place the compass tip on point F and mark an arc that intersect the previous small arc and this point G.
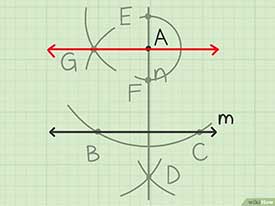
9.Draw a line connecting the given points.
This new line is perpendicular to line N ,thus its parallel to line M and passes through the given points.
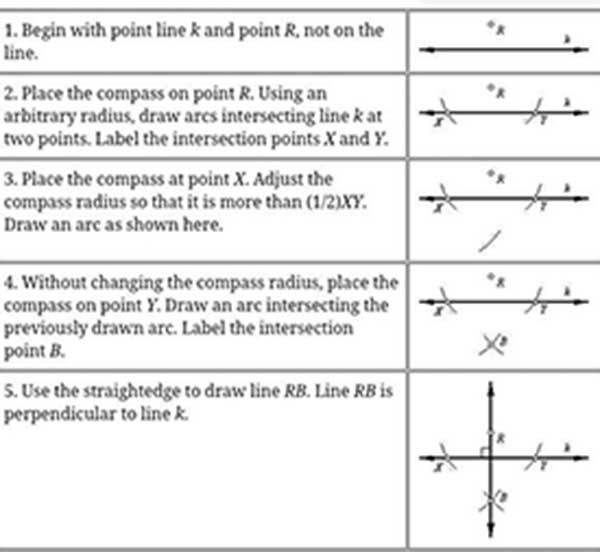
PART B .CONSTRUCTING PERPENDICULAR LINES
- Steps to follow when constructing perpendicular lines
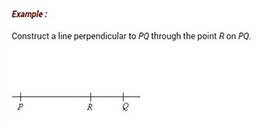
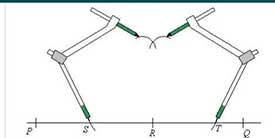
Lets construct together
- Remember the sharp end of the compass must be the same as the tip of the pencil
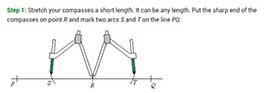
Keep the same distance(radius) always
Step2;strech the compass a little more.put sharp end of the compass on point s and mark an arc with a pencil end. Do the same on point T . Keep the same radius. Make sure that the second arc intersect the first arc and call it point w.
Observe the complete diagram
Activity
- Practice this following the steps on the table below